Acrylic Case for ModMyPi PiOT Relay Board for Raspberry Pi
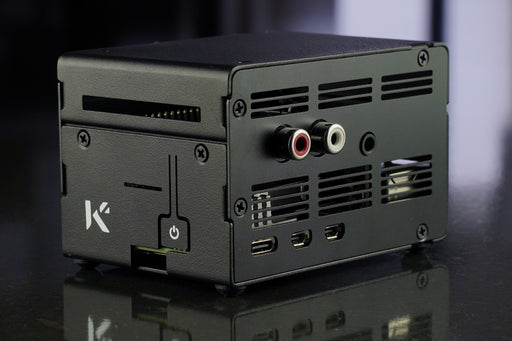
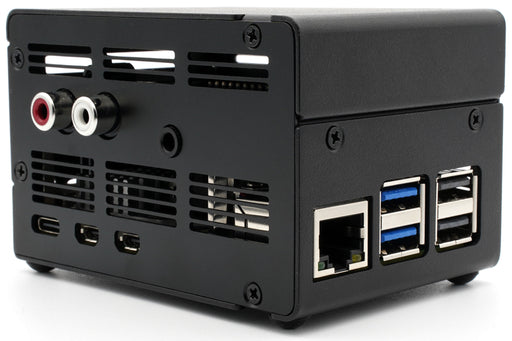
The Acrylic Case for ModMyPi PiOT Relay Board comes with all necessary accessories and components to secure the Relay Board as well as the Raspberry Pi Board. As you know that it is important to be very careful about the current passing through Relays so this case for Relay Board comes with the rubber-shields (sleeved grommets). These grommets protect the Relay Shield from being in contact with the high-voltage devices. The case has cutouts for all interfaces and connectors on the Relay Board and Raspberry Pi SBC.
Features of Acrylic Case for ModMyPi PiOT Relay Board
- Maker: ModMyPi
- Made of Laser-Cut Acrylic
- Compatible with Raspberry Pi 3B+, Raspberry Pi B+, Raspberry Pi 3, and Raspberry Pi 2
- Comes with the GPIO Slot
- Convenient access to interfaces and connectors on Raspberry Pi and ModMyPi PiOT Relay Board
- Sleeved Grommets (Rubber-Shields) (x4)
- 1x GPIO Ribbon Cable 40-Pin
- M3 Mounting Points
- Clear Top and Matte-Black Sides
Steps-by-Step Guide to Assemble Acrylic Case for ModMyPi PiOT Relay Board (with Raspberry Pi)
Before moving on to the steps to assemble the acrylic case for ModMyPi PiOT Relay Board with Raspberry Pi, let us have a look at the components and accessories needed for the assembly.
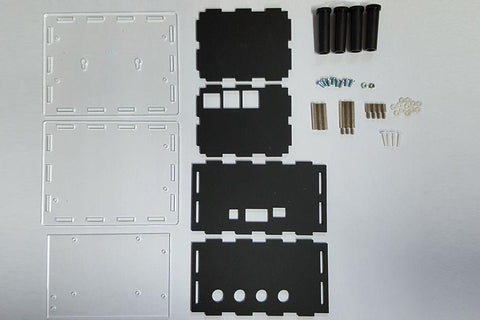
- 4x Nylon Spacers (M2.5)
- 12x Nylon Nuts (M2.5)
- 4x Sleeved Grommet (Rubber Shields)
- 8x Screws (M2.5)
- 2x Nuts (M2.5)
- 4x 8mm M/F Stand-Offs (M2.5)
- 3x 25mm M/F Stand-Offs (M2.5)
- 3x 25mm F/F Stand-Offs (M2.5)
- 7x Acrylic Plates
Disclaimer
Make sure not to put too much pressure on Acrylic because it is a tough plastic material and it could scratch if too much pressure is applied. If a scratch appears on the acrylic surface, NEVER apply a cleanser on it. Rather wash with the mild solution of dish detergent and warm water. Let the water dry over time instead of using any abrasive cloth.
Before you begin to set up the Acrylic Case for ModMyPi PiOT Relay Board, make sure to remove the adhesive film. Then follow the steps below and focus on the pictures to see if the proceedings are right on track.

1. Use the M2.5 screws to fix the 8mm Stand-offs to the bottom of the plate.


2. Once the 8mm Stand-offs are fixed, place the Relay Board over the stand-offs. Fix the assembly by using the 3x F/F 25mm M2.5 Stand-offs. The nut must be used near the top-left corner for the GPIO Header.

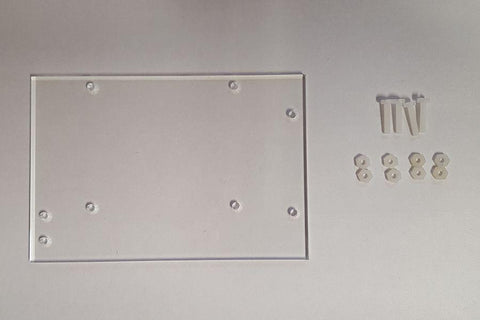
3. There are 4 mounting holes for which you need to use 4x Nylon Screws and then secure the screws with the help of the nuts (use 2 nuts on each screw).


4. Now use just one 25mm M/F standoff on the mounting hole at the bottom (on the left side).


5. Pick up the 40-Pin GPIO Ribbon Cable. You can either use the dual-row pin header or the shrouded box header to insert into the GPIO socket you have on the PiOT Relay Board. Now plug the Ribbon Cable into the pin-header or the box header, whatever you are using.


6. Pick up the center acrylic plate, place it on the standoffs and secure it with the help of 2x M/F 25mm standoffs. Secure the assembly with the help of an M2.5 screw (use it on the bottom mount on the left side).


7. Pick up the Raspberry Pi Board and place it on the nylon screws you have attached to the acrylic plate. Secure the board by using the nylon nuts.

8. Connect the Ribbon Cable to the Raspberry Pi Board.


9. Pick up the Sleeved Grommets (Rubber Shields) one by one and slide each of them along the relay side (from the backside).


10. Now it is the time to insert all plates one after another.


11. Lastly, use the screws to secure the acrylic plate.